Connect data from AutoChat to Google Analytics
- 23 Aug 2024
- 5 Minutes to read
- Contributors

- Print
- DarkLight
Connect data from AutoChat to Google Analytics
- Updated on 23 Aug 2024
- 5 Minutes to read
- Contributors
- Print
- DarkLight
Article summary
Did you find this summary helpful?
Thank you for your feedback!
We offer 2 methods to connect our data to Google Analytics:
Connect AutoChat with Google Tag Manager
GTM allows you to distribute events to third parties by using tags. To do this, you will need to provide data in the so called “data layer”. The syntax for this is:
dataLayer.push({
	"event": "name_of_the_event",
	"variable1": "value of variable1",
	"variable2": "value of variable2",
});
Currently AutoChat emits several events. You can find the events here. To listen to AutoChat events through GTM, you have to follow the following steps:
Add a custom HTML tag that adds the AutoChat event listeners
Go to your GTM container.
Go to tags and click “New”.
Then select tag type “Custom HTML”.
Give the tag a relevant name, for example “AutoChat - Event listeners”.
Add the trigger “All pages” or a specific trigger to make it specific to pages where AutoChat is loaded.
Then paste the code below in the HTML.
Save.

To make it a little easier here are 2 examples:
<script>
window.addEventListener('autochat_lead_created', function (e) {
	try {
		dataLayer.push({
			"event":e.type,
			"autochat_event_details": e.detail.eventData
		});
	} catch(e){
		//Your error handling if relevant
	}
});
</script>
<script>
window.addEventListener('autochat_lead_created', function (e) {
try {
dataLayer.push({
"event":e.type,
"autochat_event_details": e.detail.eventData
});
} catch(e){
//Your error handling if relevant
}
});
window.addEventListener('autochat_chat_first_user_interaction', function (e) {
try {
dataLayer.push({
"event":e.type,
"autochat_event_details": e.detail.eventData
});
} catch(e){
//Your error handling if relevant
}
});
</script>In example 2 you see we added a listener for two events:
autochat_lead_created
autochat_chat_first_user_interaction
In the code you see a try-catch. You optionally put your own error handling in there. Otherwise leave it as is.
Create the variables to make use of the event data
Along events, AutoChat provides additional event data which can be relevant for you:
Variable name | Relevent events | Description |
|---|---|---|
chatSessionId (deprecated) | autochat_lead_created | The unique id of the current chat session which corresponds to the id in the backend of AutoChat. Replaced by session_id and will be deleted in future. |
appointment_type | autochat_lead_created | This is the type of appointment. |
session_id | all | This is the session_id of a chat session. It's the same value for all events in a chat. |
chat_type | all (exclude: autochat_lead_created) | This is the type of chat - similar to appointment_type. |
For each of the above variables, you can follow the following steps:
Go to your GTM container.
Go to variables and under “User-Defined Variables” click “New”.
Pick “Data Layer Variable” as your variable type.
Give it an appropriate name. For example: “AutoChat - #Variable name#”.
As variable name you have to fill in the name of the AutoChat variable.
Note: be aware that you are accessing properties of object
autochat_event_detailsClick Save.
An example looks like this:

Link the events to trigger
The next step is to create triggers that allow you to trigger tags based on the AutoChat events. Follow the steps below for each AutoChat event you want to use as a trigger:
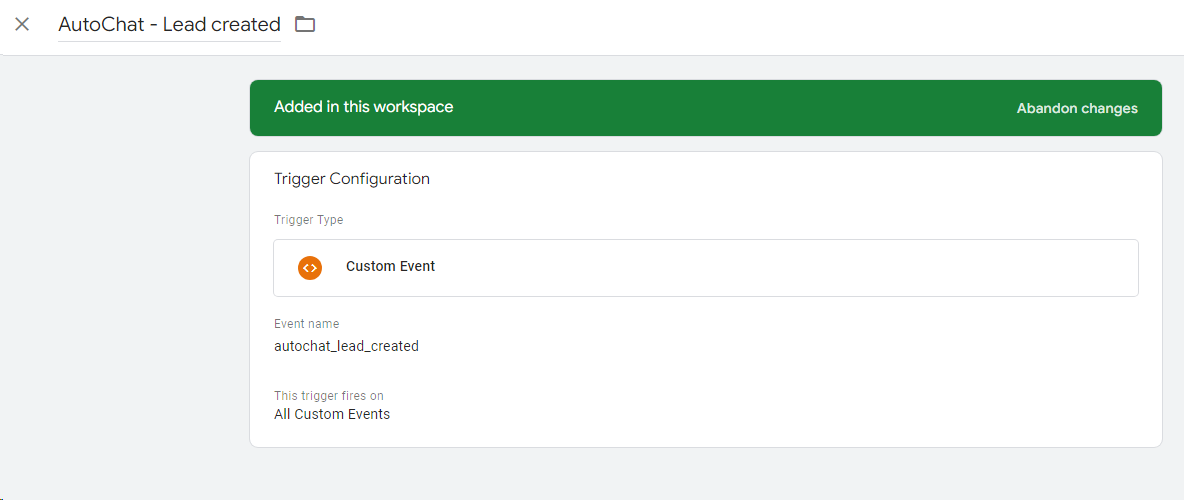
Go to your GTM container.
Then go to triggers and click “New”.
Pick trigger type “Custom event”
Give it an appropriate name. For example “AutoChat - Lead created”.
Use the AutoChat event name as the event name.
Click Save.
It should look like this:
Finalize by combining triggers and variables in your tags
You now have all building blocks to trigger tags and enrich them with data. An example of GA4 is as follows:
Go to your GTM container.
Then go to tags and click “New”.
Pick tag type “Google Analytics: GA4 Event”
Give it an appropriate name. For example: GA4 - AutoChat events.
Fill out your measurement id or link it to your Google tag config.
Fill out {{Event}} as “Event name”.
Then go to “Event parameters” and add the AutoChat variables as parameters.
Click Save.
The result will look similar to this:

You can now add any AutoChat event trigger and it will automatically send the data to GA4. You will have to follow the “GA4 custom dimensions” steps to enable the event parameters for reporting. Another example for Google Ads:

GA4 custom dimensions
To make reports based on the event parameters you added, you will have to configure so called “custom dimensions”. You can do this as follows:
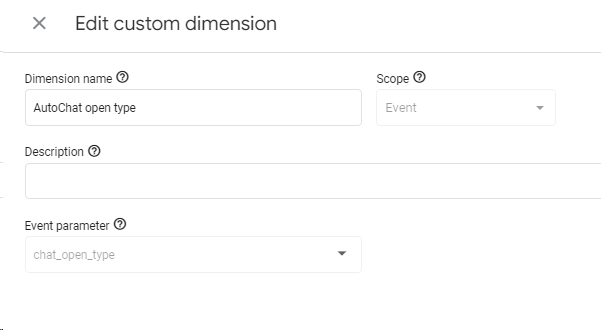
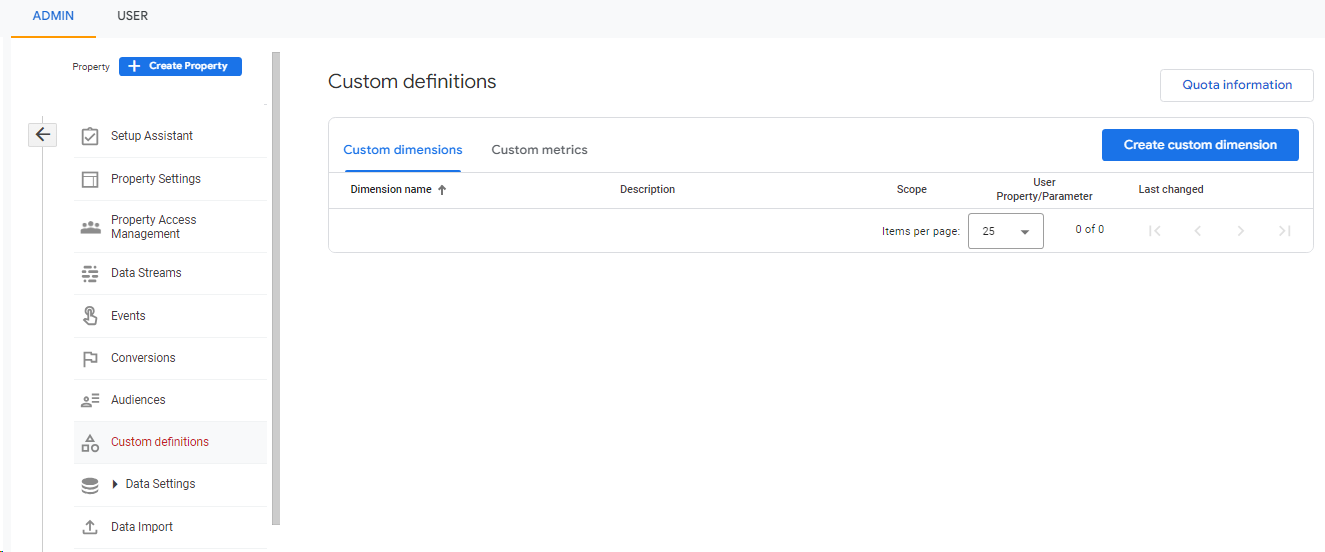
Go to your GA4 property admin.
Then go to the “Custom definitions”.
Then go to “Custom dimension” and click ”Create custom dimension”.
The dimension name should be something descriptive like “AutoChat open type”.
The scope is “Event”.
The Event parameter will be the variable name you also used in the GA4-tag. For example “chat_open_type”.
This looks as follows:
As soon as this configuration is done, you can make use of the AutoChat dimensions in your “Explore” reports.
Connect AutoChat directly to Google Analytics 4
To send data directly to GA4, you can make use of a tag management solution or the Googletag-implementation. More information about what these options are can be found in the GA4-documentation. This section is focusing on the Googletag-implementation.
Setting up your Googletag
Before you can proceed with implementing events, you will have to put the Googletag on your website. More information can be found here: https://support.google.com/analytics/answer/9304153.
Note: never use this setup in parallel with Google Tag Manager. If you have Google Tag Manager, then use the guide for that.
The basic setup looks as follows:
<!-- Google tag (gtag.js) -->
<script async src="https://www.googletagmanager.com/gtag/js?id=G-12345678"></script>
<script>
  window.dataLayer = window.dataLayer || [];
  function gtag(){dataLayer.push(arguments);}
  gtag('js', new Date());

  gtag('config', 'G-12345678');
</script>
Note: you will have to replace the G-12345678 with your own measurement id. In the documentation you can find more information on how to find your measurement id.
Setting up your AutoChat events
After the basics are finished, you can add the following code to your website. You can add the AutoChat event tracking snippet after gtag('config', 'G-12345678'); as you can see below.
<!-- Google tag (gtag.js) -->
<script async src="https://www.googletagmanager.com/gtag/js?id=G-12345678"></script>
<script>
  window.dataLayer = window.dataLayer || [];
  function gtag(){dataLayer.push(arguments);}
  gtag('js', new Date());

  gtag('config', 'G-12345678');
</script>
<script>
window.addEventListener('autochat_lead_created', function (e) {
	try {
		gtag('event', e.type, {
			'chat_session_id': e.detail.eventData.chatSessionId,
			'appointment_type': e.detail.eventData.appointment_type
		});
	} catch(e){
		//Your error handling if relevant
	}
});
window.addEventListener('autochat_chat_first_user_interaction', function (e) {
	try {
		gtag('event', e.type, {
			'chat_session_id': e.detail.eventData.chatSessionId,
			'appointment_type': e.detail.eventData.appointment_type
		});
	} catch(e){
		//Your error handling if relevant
	}
});
</script>
In the above example we added two listeners:
autochat_lead_created
autochat_chat_first_user_interaction
You can find the list of available events here: https://autochat.document360.io/docs/which-information-do-we-share.
The “e.type” will automatically populate with the name of the event. For example “autochat_lead_created”. This is also the event name you will see in GA4.
Then, after the event name, you will find all so called parameters. In the example above we have the following two event parameters:
chat_session_id
appointment_type
A list of all event parameters can be found here: coming soon.
The only thing left is that you create the event parameters as custom dimensions in GA4. Read the section “GA4 custom dimensions” for more information.
Was this article helpful?